Showing posts with label carving. Show all posts

Sunday, July 1, 2018

California Poppy Mini Print

Somehow it's already July, and it seems that the triple digit temperatures are here to stay a while. Fortunately, my little home studio is the coolest room in the house, and I can happily hibernate here all summer long. 

However, I am looking forward to getting out later this month: On the evening of July 26th, I will be hosting Art After Dark at the Bakersfield Museum of Art. Art After Dark is one of my favorite events at the BMOA. That night, Kern River Brewing Co. will be in the house pouring craft beer, and I will be leading the group in a fun linocut activity. I'm really excited to share my experience, and watch everyone's creations come to life!

Since the theme of the night is nature and the great outdoors, I created a print depicting spring's most ubiquitous little cheerleader: The California Poppy.


I don't often pull out the colors, but an orange/green gradient was a really fun look for these guys.


And as usual, I couldn't resist scanning the original print and experimenting with multiple digital iterations in Adobe Illustrator.


I love that my collection of prints is growing steadily every week! I'm just about ready to print some greeting cards. I'll be sure to announce shop updates here and on instagram @smallfoxpress

Thursday, June 14, 2018

Honey Bear Mini Print

On a roll now with tiny tabletop print #2!

Because what breakfast would be complete without a little something sweet?


The original plate measures just about 4.5x3"


I don't know which part of the process I enjoy more, carving the initial print or playing with various color palettes. Both are supremely satisfying in their own way.

These digital colorizations were created using Adobe Illustrator.


Sunday, June 10, 2018

Flowers in Technicolor

I had the best time coloring my mini flower arrangement in Adobe Illustrator.

Technology is amazing!


Miniature Floral Print

 The days are long and hot again, and somehow it's easier to find the time and inspiration to create.

It's been months since I've done any printing, so I decided to ease back into things with a mini 4x5" print. I enjoy the process of working small; the manageable size and immediate results are rather gratifying. And tiny art is just so whimsical and fun, don't you think?


I've printed a handful of these sweet little arrangements on watercolor paper. It takes a few days for the ink to cure completely, then it will be safe to wash over them with some paint.


In the meantime, I may just scan a print and play around with color options digitally. 

Stay tuned for results!

Monday, September 4, 2017

Puppy Portraits

We're doing some remodeling around the house, and I've been thinking a lot about what kind of art I'd like to put up once the dust has settled and the paint has dried. 

Prints of our fur children seemed like an obviously must!


Friday, April 28, 2017

Go Figure

I have a new work space and a happy little fig tree lives outside my window. I'm told it produces heaps of fruit, if the birds don't get to it first. It will be several weeks before the figs are ripe, but in the meantime they've inspired this design. Here's a look at my process for carving and proofing a print. 


For more process pics and videos, follow me on Instagram @smallfoxpress


Tuesday, April 25, 2017

Nesting

It's been eight months since my cross-country move back to California, and I'm only just now beginning to unpack art supplies and find my creative groove again. 

Now that I've got a physical space dedicated to making, I'm eager to start taking commissions and finally feel excited about diving back into my own projects. 

First up: Cabbage roses and a pair of sweet mourning doves.


I've really been enjoying taking colored pencils to my stamp proofs. It's a fun and therapeutic way to experiment and gets me excited for future watercolor washes and digital designs.


Fun tip: After coloring with pencil, rub your piece with a lightly oiled Q-Tip. It adds a nice sheen, blends the colors seamlessly, and really makes the picture pop.


Wednesday, June 22, 2016

New Tees, Totes, Prints and Pillows.

I just added a ton of new items featuring my prints to my shop on Society6!

Now to try and decide which to buy for myself. 

Yay, wearable art!


Wednesday, June 8, 2016

Garden Cat Linocut

From sketch to proof to print. 


Greeting cards available now in my shop!

Friday, April 22, 2016

The Evolution of a Print

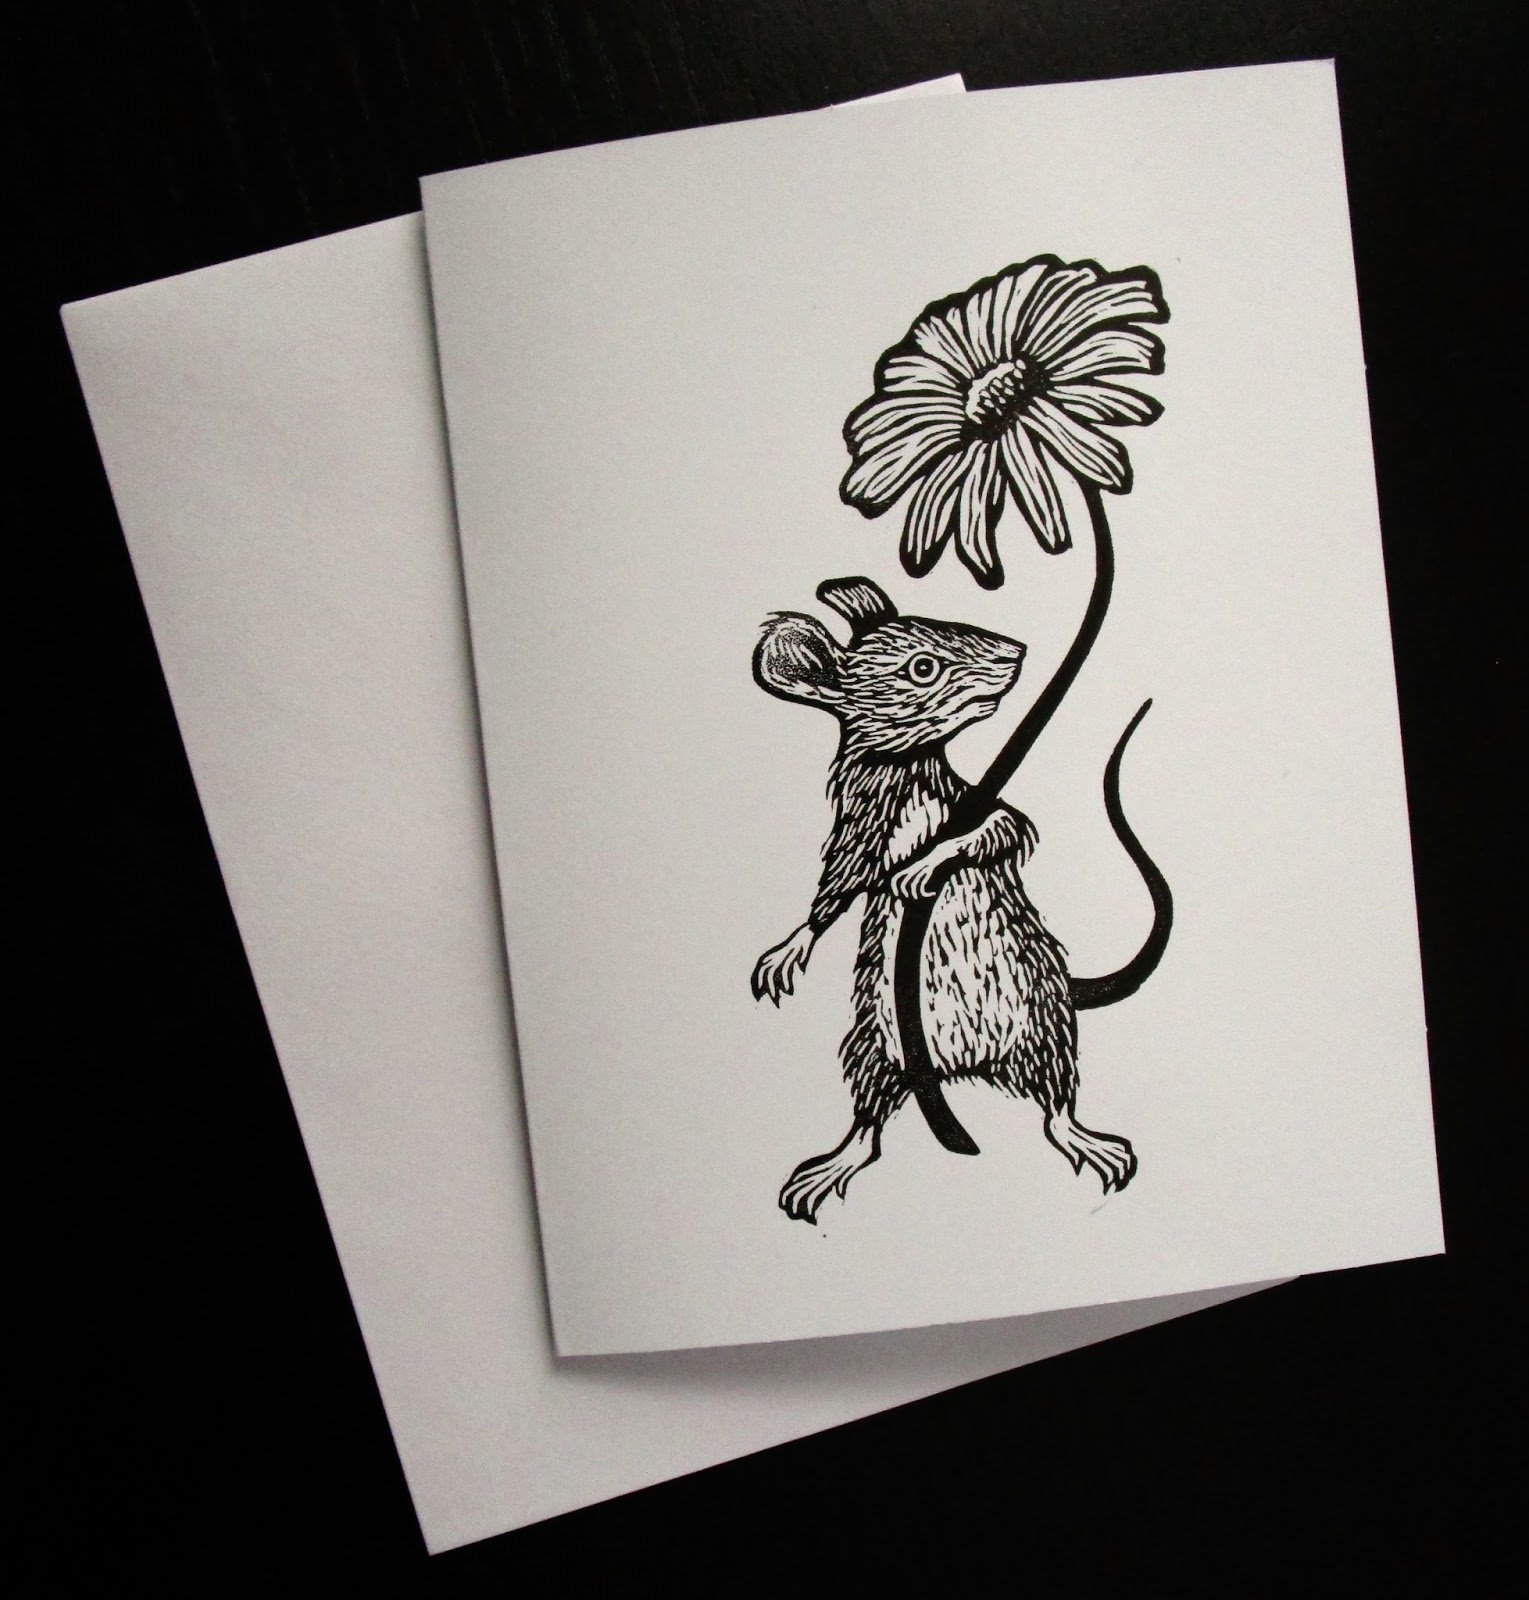
So here's the finished product. Below you'll see how this little mouse came to be. He's available now at my Etsy shop on greeting cards and as fine art prints!


Whenever I'm feeling stuck, frustrated, or doubtful about my work, I sit down in front of a blank sheet of paper and invite my heart to speak. This is what came out yesterday, and I can't imagine a more perfect metaphor.


The initial sketch: Just a little mouse with a big flower. 


Inked up the block to pull a quick proof and get a better idea of how it's coming along.


The final proof. Happy with how he turned out, I'm calling this print done. 


This piece isn't grand or earth-shattering, but it feels so dear to my heart. And though I didn't consciously plan it, the imagery represents so much to me.

It takes a tremendous amount of heart and courage to carry a big dream. Especially when you're just a small mouse.

Or a small fox.

Wednesday, April 13, 2016

Fresh Cut Tulips

Give your momma some flowers this Mother's Day! Introducing fresh cut tulip greeting cards. Here's a look at how an idea becomes a print:

Step 1. Inspiration. These sweet little gals popped up around the mailbox and I fell in love. I started out by drawing some observational sketches to get the creative juices flowing.


Step 2. Refinement. Experimenting with tracing paper to find the right composition. 


Step 3. Transferring the image to the block using pencil and carbon paper. 
Now we can get carving!


 Step 4. Printing a proof to see how the plate looks inked up.
It's darker than I'd like, so I decide to do a bit more cutting.


Step 5. Printing the finished plate on card stock using water based ink.


And that's how a print is born!

Should have these lovelies for sale on my Etsy shop by the end of the week! 

Wednesday, April 6, 2016

Frog Linocut

I've been carving on Blick E-Z Cut rubber for so long, it had actually been quite a while since I last sliced into a good ol' block of linoleum. I almost forgot how satisfying it feels to carve on these plates, and the beautiful line work and detail that they afford.

Thankfully, I discovered a box of small linoleum pieces while cleaning out my supply closet over the weekend. Which is how this little froggy wound up making his debut.

I started with this pen and ink drawing that seemed to be begging to be turned into a print.

The inked plate.

Experimenting with color and gradients.

This little guy and more new prints will be available for sale when I do a big Etsy shop update later this spring. I'm planning on stocking some original prints, hand printed greeting cards, and maybe even a few cute pieces of clothing for tiny people!

But for now I've got more carving to do.

Have an awesome week! 

Monday, April 4, 2016

Printmaking, please.

April is here, and with it a clean, organized studio and endless new possibilities! After finalizing and submitting the pieces for this month's show, I'm feeling all-too-ready to get back to working in two dimensions! 

A lifelong dabbler, I've long struggled to settle on a single medium. But if I had to pick just one type of art to make for the rest of my life, it would be hand carved prints. This is a relatively new realization for me, and a very happy one! I'm ready to put my whole heart and soul into mastering one thing, and printmaking absolutely feels right.  

Here's a little glimpse at the process behind this zinnia print I recently made. Hope it inspires you to get creative! 

It all starts with an idea. And then some sketching. And probably some erasing. And definitely a lot of tweaking. When finally I've got an image I'm happy with, it is transferred onto the carving block, and then the real fun begins!

Proofing the block to see how the design is coming along.

Time to print! 

Trying different variations of color.

Adding a big of watercolor really makes it pop!

Every time I undertake a new print, I learn so much along the way. This time I learned that I need to invest in some oil-based block printing ink if I want to watercolor over a print and not have to worry about running or smearing. But that experiment will have to wait for another day.

Thanks for stopping by! Follow me on Instagram @smallfoxpress for a bunch more process pics and updates!


Monday, April 6, 2015

Mounting Stamps

A friend asked me to carve a stamp of a petunia, and it seemed like a great excuse to try something I've been wanting to do for a long time: mount one of my handmade stamps on a block of wood.

I purchased a wooden block from a craft store for about $2 and used this as the template for the stamp.  After the carving was complete, I used a brayer to apply acrylic paint to it and stamped the image on the top of the block.


I suppose I could have waited until after I'd cut the block to stamp it, but was impressed to find that the paint held up so well through the sawing and sanding.

I took the advice of this tutorial I found on a site about letterboxing (something I'd love to try!), and scored the back of the stamp, then used Goop Glue to adhere it to the block.

After everything was dry, I pulled out my watercolors to add some pigment.  I love that the color is a bit transparent and the grain of the wood is still visible.  The final step was coating the entire block with a clear finish.


Hopefully it holds up well.

Have I mentioned that I've been playing with my stamps in Illustrator?  It's a lot of fun!


Monday, March 23, 2015

The Stamp Making Process

I can't seem to tear myself away from my desk these days.  I've got a secret project in the works, which hopefully I'll be able to share with you soon.

For now here's a quick look at the process behind the hand-carved stamps I've been making.  


I start with a drawing, which I cut out with a fine-point blade.


Placing the images on the rubber.


With a pencil, I trace the cut-outs to make a silhouette, then add the detail by hand.


Cutting out the individual stamps.


Carving the stamp.


The finished product: An inked stamp and the stamped image on paper.